 Help
HelpSUBTOTAL:
$0.00 CAD


Nouvelles
How to Organize Desk Cables Without Drilling for a Cleaner, More Flexible Setup
Caitlin Agnew-FrancisA messy desk can make an otherwise polished workspace feel unfinished. Loose charging leads, visible computer cords, and tangled power cords can quickly take over the desk surface, the floor below, and the back of the setup. For renters, students, and anyone who does not want to damage furniture, learning how to organize desk cables without drilling can make a real difference. The good news is that there are simple ways to improve cable control without screws, holes, or permanent changes. With the right accessories, a little planning, and a layout that suits your routine, you can create a cleaner desk that looks better and feels easier to use every day. Whether you are setting up a home office, gaming zone, study nook, or shared room workspace, drill-free cable organisation can help keep clutter down while protecting your desk design.
Why Drill-Free Cable Management Works So Well

Not every workspace suits a permanent fix. Many people work from a rental, a shared home, a bedroom office, or a flexible setup that changes over time. In these spaces, drilling into the desk or wall may not be practical. It can also leave marks that are hard to repair later. That is why drill-free cable management works so well. It gives you a way to organise cords, hide clutter, and improve the look of your space without committing to a fixed layout.
A no-drill setup is also easier to adjust. If you swap monitors, add a desk lamp, move your laptop dock, or rearrange furniture, adhesive accessories and removable organisers make those changes much simpler. You are not locked into one layout. That flexibility matters in a modern office where equipment often changes, and the desk may need to serve different purposes throughout the week.
There is also a visual benefit. A desk looks more polished when cables follow clean paths rather than spilling across the back edge or hanging down in random lines. The room feels calmer, and the workspace becomes easier to clean. Even a simple improvement, such as lifting a power strip off the floor or guiding one charging cord through a clip, can make a clear difference.
Drill-free cable management is a practical match for:
-
Renters who want to avoid marks
-
Home office users who adjust their layout often
-
Students working in compact rooms
-
Gamers managing multiple devices
-
Anyone upgrading a desk without changing the furniture
This type of setup is not about making every cable disappear completely. It is about making the desk easier to use, easier to maintain, and easier to keep looking tidy over time.
Start by Sorting Every Cable on and Around the Desk
The easiest way to improve cable organisation is to begin with a full reset. Before attaching clips or routing wires, take a look at everything connected to the desk. That includes computer wires, monitor leads, chargers, extension cord runs, power cords, and anything plugged into a power bar or power strip nearby.
Unplug what you safely can and sort the cables into groups. This helps you understand what is actually in use and what is creating unnecessary clutter. Many desks collect extra cords over time, including old charging leads, spare adapters, duplicate monitor cables, or accessories that are no longer needed.
A simple sorting process can save a lot of frustration later:
-
Group monitor and display cables together
-
Separate charging cords from permanent cables
-
Identify which cords need daily access
-
Note which devices stay in one place
-
Remove any cable that no longer serves a purpose
This also helps you see how many visible runs the desk really needs. In many cases, fewer cables need to stay accessible than people think. A laptop charger, a phone cord, and maybe one accessory lead may stay near the front of the desk. Most other cords can usually be routed along the back or underneath.
If you use your desk in the middle of the room rather than against a wall, this step becomes even more useful. Open layouts make clutter more visible from all sides. When you know which cables matter most, it becomes easier to create a route that looks clean from the front, sides, and back.
A tidy desk starts with clarity. Once the cables are sorted, every other choice becomes easier because you are working with what you actually need, not with months of built-up clutter.

Use Adhesive Clips, Sleeves, and Ties to Guide Cords Neatly
Once the cords are sorted, the next step is guiding them into cleaner paths. This is where simple accessories can do most of the work. Adhesive clips, cable sleeves, and reusable ties are often enough to improve a desk setup without drilling into the surface.
Adhesive clips are useful for single cords that need to stay in place. A charging cord near the front of the desk, for example, can be kept tidy with a clip that stops it slipping behind the desk when not in use. Clips also help direct cables along the back edge or underside of the desktop so they do not hang loosely.
{{ spec_cable_clip_organizer }}
Reusable ties are helpful when several cables travel in the same direction. They can bundle monitor leads, keyboard wires, or grouped charging cords without making future changes difficult. This is one reason they work so well in a home office, where devices get swapped out from time to time.
Cable sleeves are a good choice when you want several visible cords to look like one neat line. They are especially useful when a group of computer cords needs to run down one side of the desk or from the back of the desk to a nearby power source. Instead of several loose lines, you get one cleaner run that blends better with the room.
A few practical habits make these tools work better:
-
Leave some slack near plugs and connection points
-
Group cables by destination, not just by type
-
Keep daily-use cords separate from fixed cables
-
Avoid pulling a cord too tightly
-
Label similar cables if you use several at once
This part of the process is where the desk begins to look cleaner fast. The surface feels less busy, the back of the setup looks more organised, and the whole design starts to feel more intentional.
{{ spec_cable_kit }}
Hide Power Strips and Extra Length Without Screws
Power clutter is often the biggest reason a desk looks messy. Even when individual cables are reasonably tidy, one loose power strip or overloaded power bar can make the whole setup feel disorganised. The good news is that you do not need screws to improve this part of the desk.
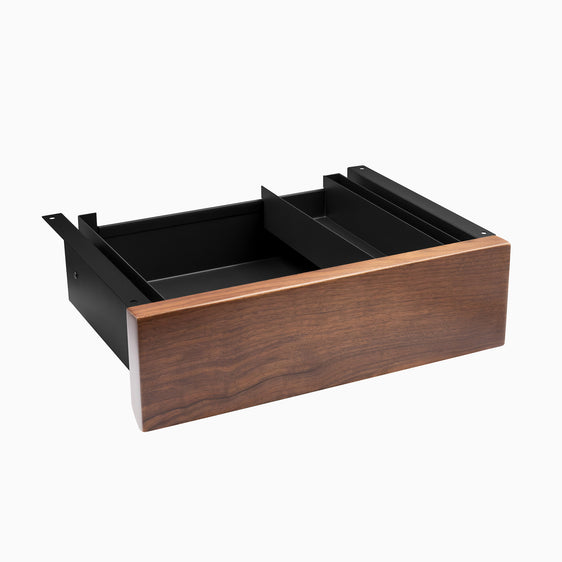
One of the simplest options is to place the power strip inside a cable box. This helps contain bulky plugs, adapters, and extra cord length in one spot. A cable box can sit neatly under the desk, beside a desk leg, or close to the wall without looking messy. It also helps reduce dust build-up around exposed plugs and makes the room feel less cluttered.
Another option is to use strong, removable adhesive mounts or straps designed for under-desk use. These can help keep a power strip raised off the floor without damaging the desk. Lifting the strip even a little can improve cable flow because cords no longer need to drag across the floor before reaching the desk.
If you have too much cable length, avoid stuffing everything into one thick bundle. Instead:
-
Coil excess length loosely
-
Secure it with a reusable strap
-
Place the bundle in a cable box or along the back edge
-
Keep it separate from cords you unplug often
This approach works well in a small room where every bit of visual clutter stands out. It also makes cleaning easier because there are fewer loose cables sitting near your feet or chair wheels.
For people using a desk in a shared office or open-plan space, hiding the power source neatly can make the whole setup feel more polished. It is often the difference between a desk that looks functional and one that looks carefully put together.
Create a Clean Cable Path for Sit-Stand and Flexible Desk Setups
A moving desk needs a little more planning. Sit-stand desks are great for comfort and flexibility, but they also create a new challenge. Cables need to move with the desk without catching, stretching, or falling into a tangled line.
The first step is to think about the main cable path. Most setups work best when cables are grouped together under the desk, then guided through one main drop point toward the wall or floor outlet. This keeps movement more controlled and reduces the chance of wires pulling in different directions.
No-drill cable organisation works especially well here because it lets you test the layout before committing to it. Adhesive clips, sleeves, and removable ties can all be adjusted until the route feels right.
When managing a sit-stand desk, it helps to:
-
Test the full height range before securing everything fully
-
Leave enough cord slack for movement
-
Keep the main drop path clear of desk legs
-
Guide grouped cables along the back underside of the desk
-
Check that the extension cord or power source still reaches comfortably
This is also where desk placement matters. A desk against the wall often hides cables more easily. A desk in the middle of the room needs a cleaner routing because the back remains visible. In that kind of layout, sleeves and clips can help keep the line neat so the design still looks tidy from every angle.
A flexible setup should feel easy to use, not fragile. When the cable path supports movement properly, the desk rises and lowers smoothly, and the room stays looking clean.

Common Mistakes That Make Desk Cables Look Worse
Some desk setups stay messy not because there are too many cables, but because a few simple mistakes keep creating clutter. Avoiding these problems can improve the look of the workspace without buying much at all.
One common mistake is relying on one oversized bundle. When every cord gets tied together, the result may look neat for a day, but it becomes hard to trace a single cable later. Smaller grouped runs usually work better.
Another mistake is keeping unused cords in the setup. Old chargers, spare monitor leads, or unnecessary adapters take up room and make cable management harder than it needs to be.
Poor cable length choices also cause problems. A cord that is far too long creates loops and mess. A cord that is too short adds tension and makes routing awkward. Aim for lengths that suit the actual distance between the device and power point.
A few other mistakes to avoid include:
-
Placing the power strip where every cable has to cross open space
-
Mixing daily-use charging cables with fixed monitor leads
-
Leaving computer cords loose near chair wheels
-
Skipping labels when several similar wires are in use
-
Ignoring the back of the desk in an open room layout
It is also easy to focus only on the desk surface and forget the area below. Under-desk clutter often creates the biggest visual problem, especially in a home office where the workspace stays visible throughout the day.
A cleaner setup usually comes from making small, better choices, not from chasing a perfect result. When you remove unnecessary items, improve the main routes, and keep things easy to maintain, the desk starts to stay tidy with less effort.
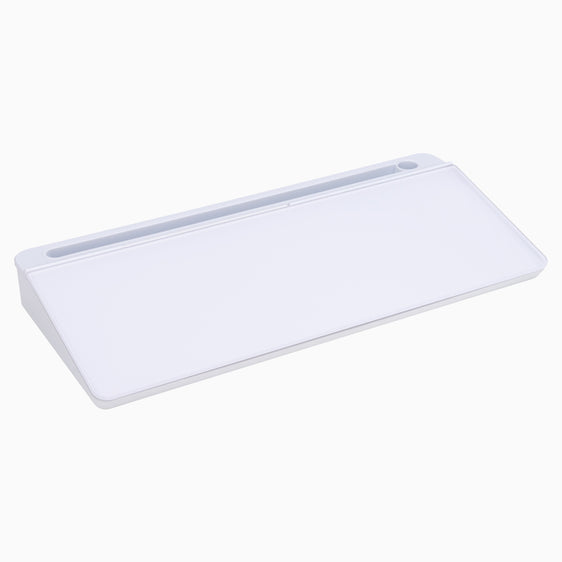
{{ spec_mini_cable_power_tray }}
Build a Cleaner Workspace With Desky Accessories
A tidy desk helps a workspace feel calmer, easier to use, and more visually polished. When cables are sorted, guided properly, and hidden where possible, the desk becomes more functional without losing flexibility. That matters whether you work from home, study in a small room, or use a shared office setup that needs to stay neat.
Drill-free cable organisation makes that easier. You can improve the look of the desk, manage power cords and computer wires more effectively, and protect the furniture at the same time. It is a practical solution for renters, students, remote workers, and anyone who wants a cleaner setup without making permanent changes.
Desky offers workspace solutions that support cleaner desk organisation, including accessories designed for modern workstations, flexible office layouts, and sit-stand setups where better cable control matters. The right accessories can help you hide a strip, guide cords more neatly, and create a design that feels more considered from day one.
If your current desk still feels cluttered, it may not need a full reset. A few smart changes can make a real difference.
Browse Desky’s cable management and desk accessories to build a setup that looks cleaner, works better, and stays easier to manage over time.

You may also like

Desk Cable Management Mistakes to Avoid
A clean desk can still feel messy when cables are left trailing across the surface, hanging under the ...
Apr 23, 2026

Step by Step Desk Cable Management Guide for a Cleaner, Mo..
A messy desk rarely starts with one big problem. It usually builds up slowly through charging cables, ...
Apr 20, 2026

Easy Desk Cable Management Hacks for a Cleaner, More Funct..
A tidy workspace can change how your day feels. Loose cords under a desk, tangled charging leads, and ...
Apr 17, 2026

How to Clean Dust from Desk Cables
Dust builds up quickly around any desk. It settles on screens, shelves, monitor arms, keyboards, and d...
Apr 16, 2026